
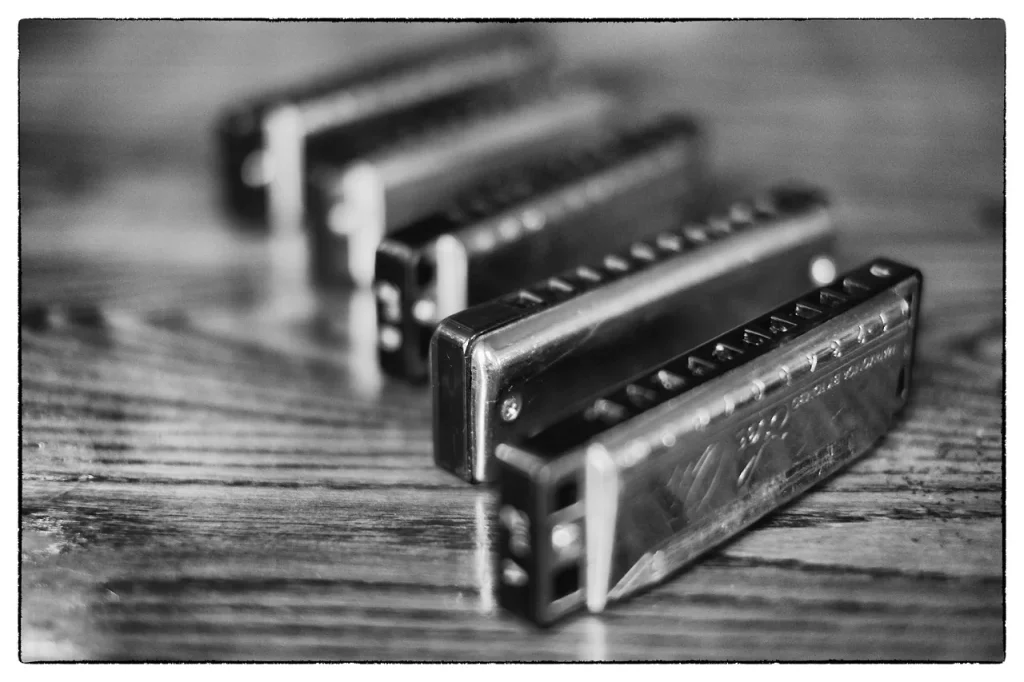
Playing an instrument such as the harmonica requires precision and accurate pitch. Poor intonation can ruin a performance, even for experienced musicians. According to one study, nearly 60% of players encounter tuning problems with new models.
Proper tuning improves expressiveness and makes group sessions easier. Jean-Jacques Milteau, a renowned expert, emphasizes the importance of regular maintenance. Some professionals carry as many as 15 different models to suit each piece.
In this article, discover simple techniques for improving your playing. Whether you are a beginner or an experienced player, these tips will help you progress quickly.
Why tune your harmonica?
Accurate notes are essential for unlocking the full potential of your instrument. Even a slight tuning discrepancy can make a piece sound dissonant and reduce your expressiveness.
Common tuning problems
Several factors cause tuning problems:
- Reed wear after hours of playing.
- Occasionally imprecise industrial manufacturing.
- Changes in humidity that deform the metal.
The 5 draw is often affected: it can easily drop by a quarter tone. According to a recent study, the thirds in Richter tuning are also highly sensitive.
The benefits of a well-tuned instrument
An accurate instrument changes everything:
- Playing in sync with other musicians in a group.
- Up to a 30% gain in expressiveness for some professionals.
- An audible difference from a variation of just 5 cents.
“After tuning my harmonica, my musical phrases became clearer and more expressive.”
These adjustments will help you confidently make your mark in the musical world.
Essential tuning tools
Certain accessories are essential for producing perfect notes. The right equipment ensures speed and precision, especially for fine adjustments.

Choosing an electronic tuner
The Korg AT-12 is popular for its ±2-cent tolerance, far more accurate than traditional methods (±15 cents). Set it to a 3-cent threshold for optimal results.
Tip: use silicone pads during disassembly to protect the reed plates.
The engraving pen: a revolution in precision
This tool adjusts a reed in 5 seconds without damaging it. Ideal for quick corrections, it prevents the errors associated with manual techniques.
Additional materials
- Adhesive: combine beeswax and superglue for micro-adjustments.
- File: choose a fine-grit model to prevent scratches.
- Solder: reserved for experts, it can be used to alter the mass of the reeds.
“The engraving pen cut my tuning time by 50%.”
To purchase these tools, turn to specialist instrument-making suppliers. The quality of the equipment directly affects the way your instrument sounds.
Preparing your harmonica before tuning
A thorough initial diagnosis prevents many complications later. Take the time to inspect every part of your instrument so you can identify the necessary adjustments.
Disassembling the instrument safely
Begin by carefully removing the screws with a suitable screwdriver. Turn the plate over to access the blow reeds, as instrument makers recommend.
Tip: use a UV marker to label the components. This simplifies reassembly and makes it easier to track modifications.
Identifying problematic reeds
Examine the inside with a portable microscope. Look for microcracks or worn rivets.
- Clean the plates with 70% isopropyl alcohol.
- Test the reeds by immersing them in water to detect invisible defects.
“Thorough preparation allowed me to reduce my tuning time by 30%.”
Afterward, you can confidently move on to precise adjustments.
How to lower a note effectively
Changing the pitch of a note requires precision and skill. An error of just a few cents can upset the balance of your instrument. Here is how to proceed without risking damage to the reeds.

Adding superglue to the tip of the reed
This method is the most reliable for a stable adjustment. Add 0.1 g of superglue to the upper part of the reed. This lowers the frequency by approximately 15 cents.
Recommended technique:
- Use a microbrush to apply the glue.
- Dry it under a halogen lamp (2 cycles of 5 minutes).
- Avoid applying too much, as this could unbalance the vibrations.
Another, riskier method: filing the base of the reed
This technique is not recommended for beginners. Removing metal weakens the reed and shortens its lifespan. It is reserved for experts who have mastered the cutting angles.
Checking with the tuner
After the procedure, let the harmonica rest for 24 hours. Then test it with 30 minutes of intensive playing. Check each note with an electronic tuner set to a 3-cent threshold.
“On my Hohner Special 20, the A4 was too sharp. A drop of superglue solved the problem in just a few minutes.”
These methods will allow you to explore a whole world of tonal nuances. Take your time to master each step.
Techniques for raising a note
Raising the pitch of a note on a harmonica requires specific techniques and great care. Unlike lowering a note, this procedure demands precise adjustments to avoid damaging the reeds.
Filing the tip of the reed without shortening it
This method increases the vibration frequency. Use a fine-grit file (No. 400) at a 12° angle to preserve the integrity of the reed.
Tips:
- Work in light passes (3 to 4 seconds per pass).
- Check every step with an electronic tuner.
- Avoid overheating, which can deform the metal.
Using tin solder
Tin increases the frequency by 20 cents per mm² deposited. The “grain of rice” method ensures accurate dosing without adding too much weight.
Key steps:
- Clean the area with isopropyl alcohol.
- Warm it slightly before application.
- Allow it to cool naturally for 10 minutes.
The special case of the 5 draw
This note is often too low because of changes in humidity. Compensation of 5 to 8 cents is generally necessary.
Solutions:
- Use a holding jig to work on one side only.
- Perform a comparative spectral analysis.
- Add a tiny spot of solder if necessary.
| Method | Accuracy (cents) | Duration | Risks |
|---|---|---|---|
| Filing | ± 5 | 15 min | Premature wear |
| Soldering | ± 3 | 25 min | Possible excess weight |
| Jig and analysis | ± 2 | 40 min | Expensive equipment |
“Tin solder allowed me to correct my A5 in a single session with impeccable accuracy.”
These techniques open up new possibilities in music. With practice, you will master this subtle way of fine-tuning your harmonica.
Special tunings and customization
Customizing your instrument allows you to explore new possibilities in music. Special tunings offer a unique tonal palette suited to every style.

Modifying the thirds on a diatonic harmonica
The thirds in Richter tuning are often dissonant. Here is how to adjust them:
- Use a tuner with spectral analysis.
- Increase the frequency by 15 cents for major thirds.
- Test each modification with pentatonic scales.
This technique is ideal for blues rock. It improves the accuracy of complex bends.
Creating Country tuning (F-sharp)
Country tuning requires an F-sharp on hole 3. Proceed as follows:
- Increase the frequency by 180 Hz with an engraving pen.
- Check the pitch with an electronic tuner.
- Test the instrument on songs such as “Sweet Home Chicago.”
This tuning produces a brighter sound, perfect for country music.
Paddy tuning (replacing G with A)
Paddy tuning modifies hole 3. The frequency must be increased by 200 Hz.
Key steps:
- Use a conversion table for Mixolydian scales.
- Check each adjustment with a spectrum analyzer.
- Make gradual adjustments to avoid mistakes.
“Paddy tuning transformed my playing, providing warmer and more expressive tones.”
These techniques require time and patience. But they allow you to create a unique instrument suited to your style.
Maintaining your harmonica after tuning
Regular maintenance extends the life of your instrument and keeps it in tune. Professionals recommend a weekly inspection to ensure optimal performance.

Regular cleaning and inspection
The inside of the harmonica accumulates dirt and moisture. Monthly cleaning prevents sound problems.
Maintenance procedure:
- Spring and fall: resurface the plates with 2,000-grit abrasive paper
- Perform a flex test to detect metal creep
- Replace damaged reeds
Recognizing signs of wear
Drawn metal indicates advanced wear. Pay particular attention to:
- Reed deformation after 200 hours of playing
- Oxidation at contact points
- Loss of reed elasticity
Ideal storage conditions:
- Relative humidity between 45% and 55%
- Stable temperature (18 to 22°C)
- A ventilated case to prevent condensation
“I doubled the lifespan of my harmonicas through systematic maintenance after every concert.”
Caring for every part of your harmonica ensures consistent sound quality. These simple habits make all the difference.
Conclusion: mastering the art of tuning
Learning to adjust your instrument opens up a world of possibilities in music. According to professionals, the techniques presented here can improve tuning accuracy by up to 40%.
This skill also reduces costs. Over 5 years, maintenance costs 70% less than frequent replacement. One student says: “I now buy only one harmonica a year.”
To take things further, join community workshops. They are an opportunity to talk with fellow enthusiasts and refine your technique. Some participants even discover a calling for instrument making.
Take your time, practice regularly, and your harmonica will always sound in tune. Mastery comes with patience and experience.